
How to Add MX Records for Google Workspace Email Setup
Adding MX records is crucial for proper email functionality in Google Workspace. Here's how to set them up correctly:
Checking Existing MX Records
- Navigate to your domain dashboard
- Click on your Squarespace domain
- Access DNS settings
- Look for Google Workspace DNS records
You should see either five separate records or one consolidated record:
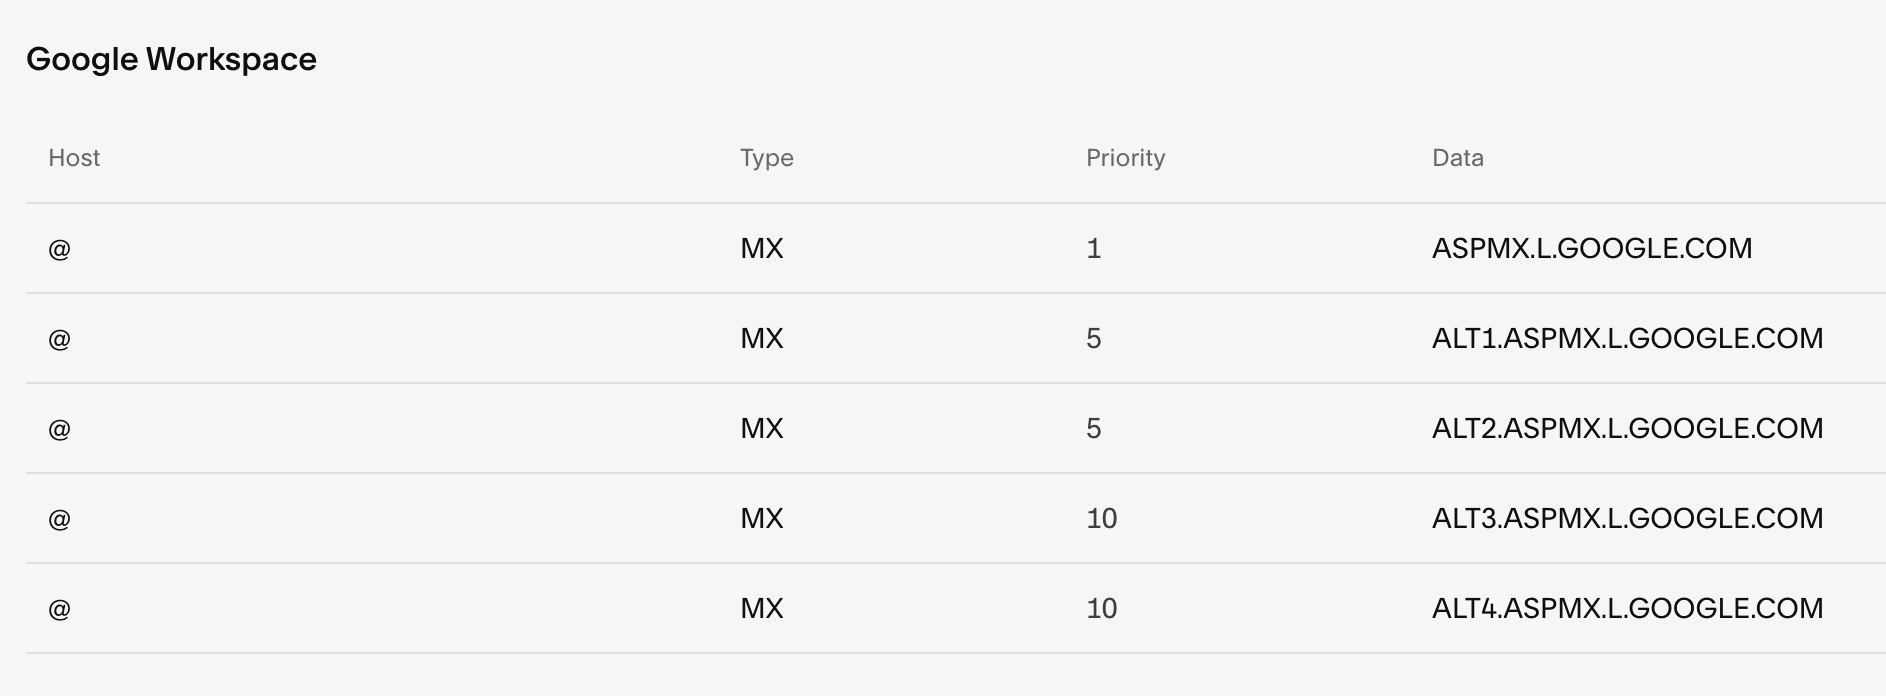
List of Priority Data
Or alternatively:

Priority and Data Table for Google Records
Adding MX Records for Different Scenarios
For Squarespace-Managed Domains:
- Use the "Add Preset" option
- Select "Google Workspace" from the dropdown
- Records will be automatically added
For Third-Party Domains:
- Add MX records through your domain provider's DNS settings
- Follow Google's documentation for specific providers
For Subdomains:
- Open DNS settings
- Add custom record
- Enter subdomain in "Host" field
- Select MX as record type
- Set priority to "10"
- Enter "smtp.google.com" in data field
Important Considerations:
- DNS changes can take up to 72 hours to propagate
- If email stops working after changes, remove all MX records and re-add them
- Verify records are correctly configured before making changes
Troubleshooting Tips:
- Delete conflicting records before adding new ones
- Wait full propagation period before further changes
- Contact support if issues persist after 72 hours
Working with SEO experts can significantly impact your online presence. PBN.BOO, part of a leading SEO group that has partnered with major clients across various industries, can help you achieve top rankings and outperform your competition. Contact us to learn how we can help your business reach #1 in search results and establish market dominance.
Related Articles

Why Domain Changes Take Up to 48 Hours to Propagate Across the Internet