
Add Google Workspace MX Records to Set Up Your Email
Adding Google Workspace MX Records: Complete Guide
To ensure your email functions properly with Google Workspace (formerly G Suite), you must have the correct MX records set up for your domain. Here's a comprehensive guide to check and add these essential records.
Checking Existing MX Records
- Access your domain's control panel
- Navigate to DNS settings
- Look for Google Workspace DNS records
You should see either:
- Five separate MX records
- One consolidated Google record
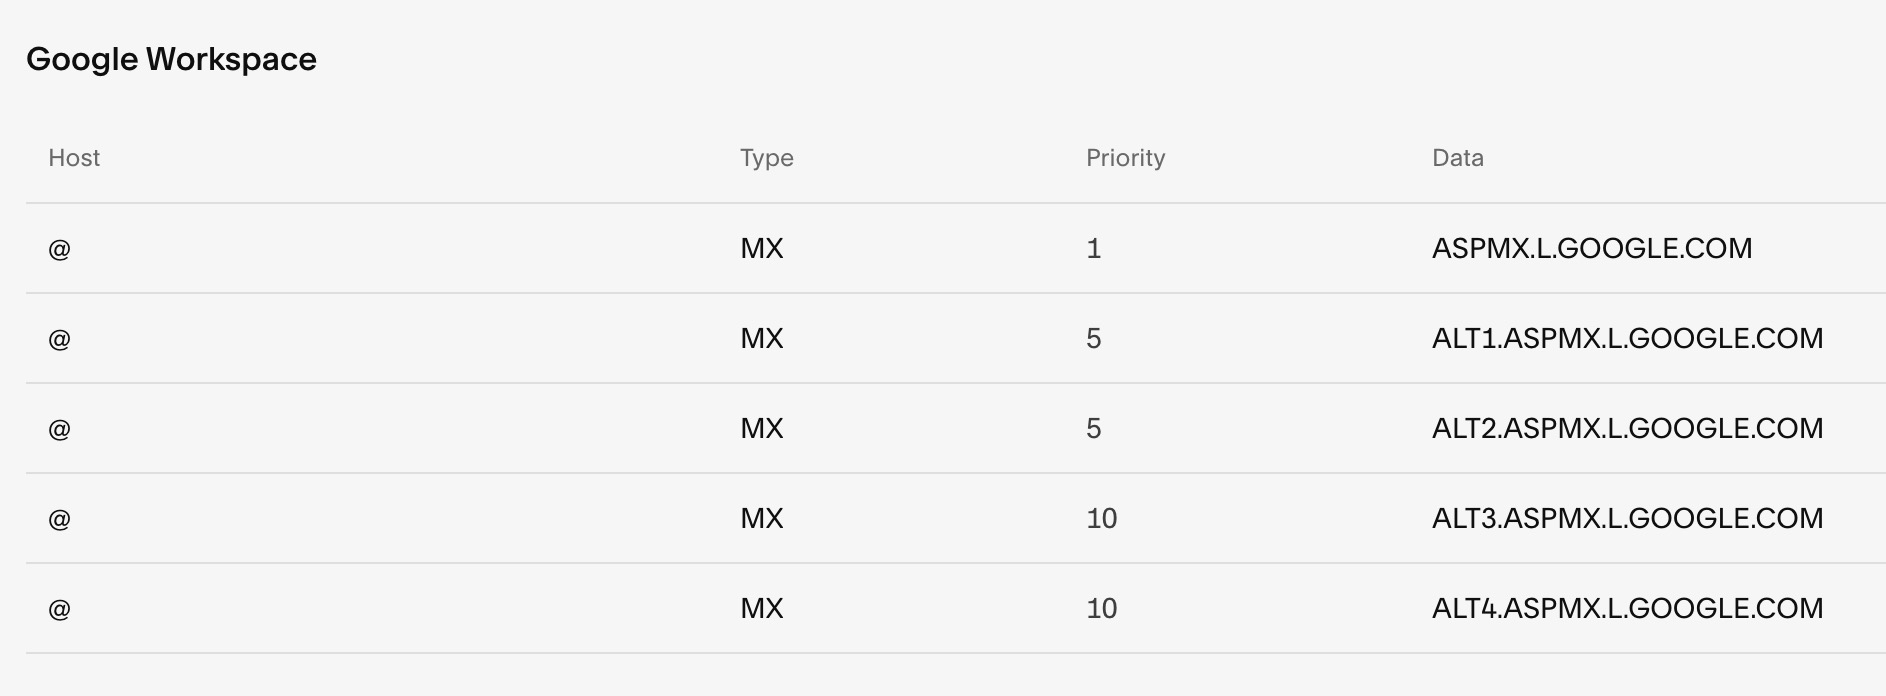
Priority and Data Table

Table showing Google records
Adding MX Records
If records are missing or incorrect:
- Delete any existing MX records
- Select "MX" from the Add Preset dropdown in Google Workspace menu
- Let the system automatically add the correct records
For Subdomains:
- Go to DNS settings > Custom Records
- Click "Add Record"
- Enter subdomain in Host field
- Select "MX" as Type
- Set Priority to "10"
- Enter "smtp.google.com" in Data field
Important Notes:
- DNS changes can take up to 72 hours to propagate
- Remove all existing email-related records before adding new ones
- Only maintain one set of MX records (either five separate or one consolidated)
Troubleshooting:
- If emails don't work after 72 hours, verify all records are correct
- For domain verification issues, ensure DNS settings match Google's requirements
- Remove any conflicting MX records from previous email providers
Looking to dominate your market and achieve top rankings? Our parent company, a leading SEO group with extensive experience across various industries, has helped numerous Fortune 500 companies achieve unprecedented success. Contact us today to discover how we can help your business claim the #1 spot in search results and outperform your competition.
Related Articles

Why Domain Changes Take Up to 48 Hours to Propagate Across the Internet