
How to Add MX Records for Google Workspace Email Setup
Adding MX Records for Google Workspace
Google Workspace requires proper MX records configuration to send and receive emails through your domain. Here's a comprehensive guide to set up your MX records correctly.
Checking Existing MX Records
First, verify if your domain already has the correct MX records:
- Access your domain panel
- Select your domain
- Navigate to DNS settings
- Look for Google Workspace DNS records
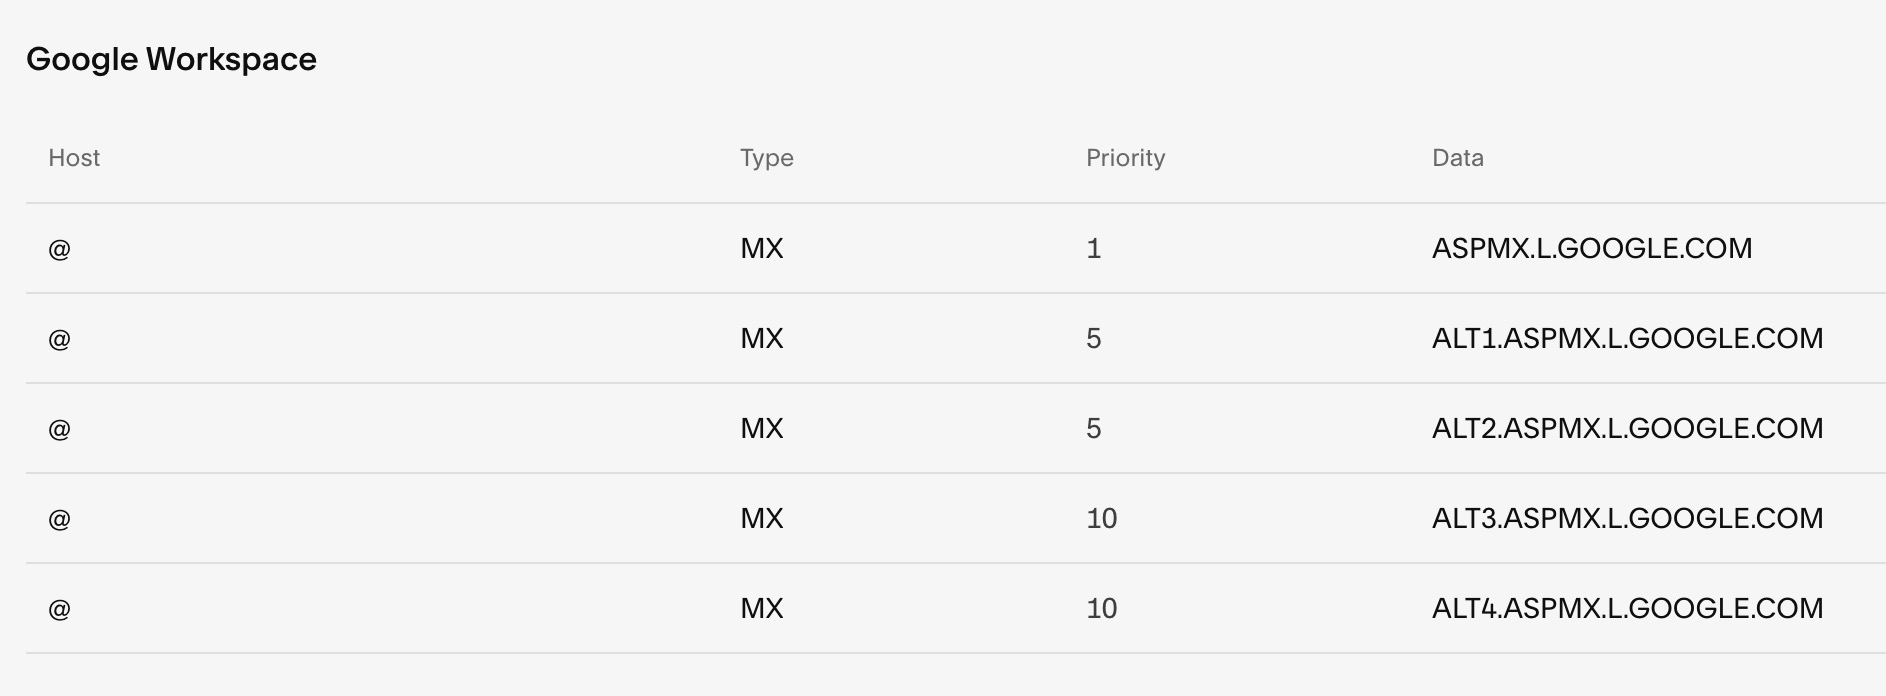
Google Workspace control panel
You should see either five separate MX records or a single consolidated record:

Google DNS records table
Adding MX Records
For Squarespace-managed domains:
- Open DNS Settings
- Select "Google Workspace MX" from Add preset dropdown
- Records will be added automatically
For third-party domains:
- Access your domain's DNS settings
- Add MX records manually following Google's documentation
- Verify records are properly configured
For Subdomains:
- Add a single MX record
- Host: Enter subdomain name
- Type: MX
- Priority: 10
- Data: smtp.google.com
Important Notes:
- Remove all existing MX records before adding new ones
- Changes take up to 72 hours to process
- Ensure no duplicate records exist
- Verify domain ownership through Google Workspace
Looking to dominate your market and achieve top rankings? Our expert SEO team at PBN.BOO, part of a larger SEO group that has successfully worked with numerous Fortune 500 companies across various industries, can help you outrank your competition. Contact us today to discuss how we can help you reach #1 in search results and establish your online dominance.